Mariadb 다운로드
마리아디비 홈페이지에서 다운 받습니다.
https://mariadb.org/download/?t=mariadb&p=mariadb&r=10.6.7&os=windows&cpu=x86_64&pkg=msi&m=yongbok
Download MariaDB Server - MariaDB.org
REST API Release Schedule Reporting Bugs … Continue reading "Download MariaDB Server"
mariadb.org

저는 MariaDB Server 10.6.7 버전을 받았습니다.
이제 설치를 해주면 되는데요. Windows에서 설치하는 것이니 참고해주세요.
다운받은 파일을 실행하면 아래와 같이 Setup 화면이 나타납니다.


라이선스 동의 후 Next가 활성화 됩니다.

Custom Setup을 하셔도 되고 전 그대로 Next로 넘어갔습니다.
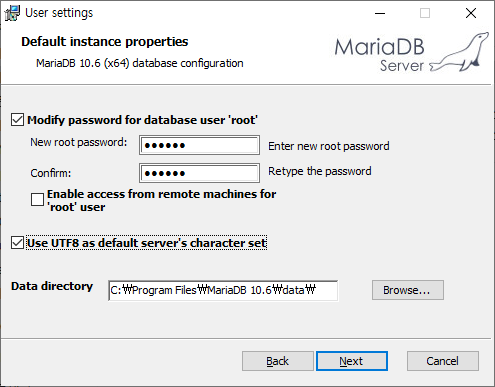
이제 root 계정의 비밀번호를 설정하고 Next 누르면됩니다.
그리고 기본적으로 UTF8을 사용할 것이기 때문에 Use UTF8 as default server's character set을 체크했습니다.
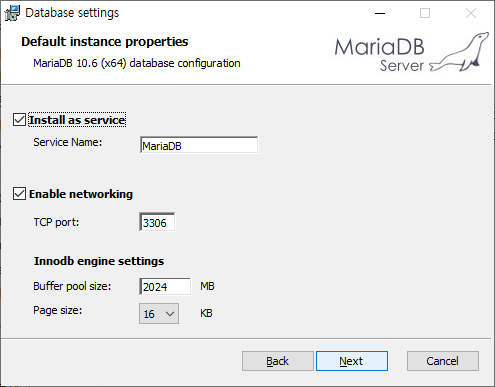
다음은 서버 이름과 포트설정 그리고 버퍼사이즈를 입력합니다.

이제 설치(인스톨)를 합니다.


Finish로 종료하면 설치가 완료된 것입니다.
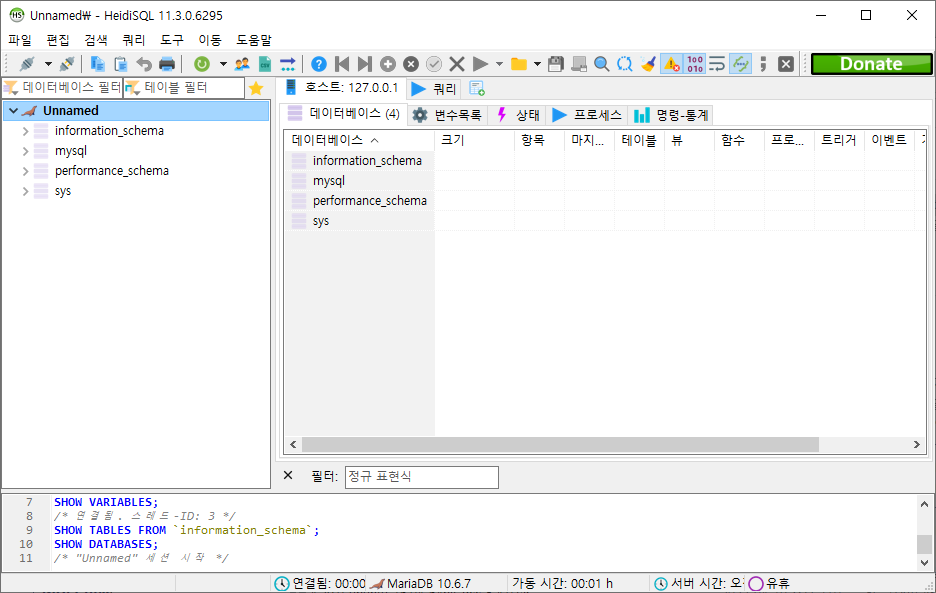
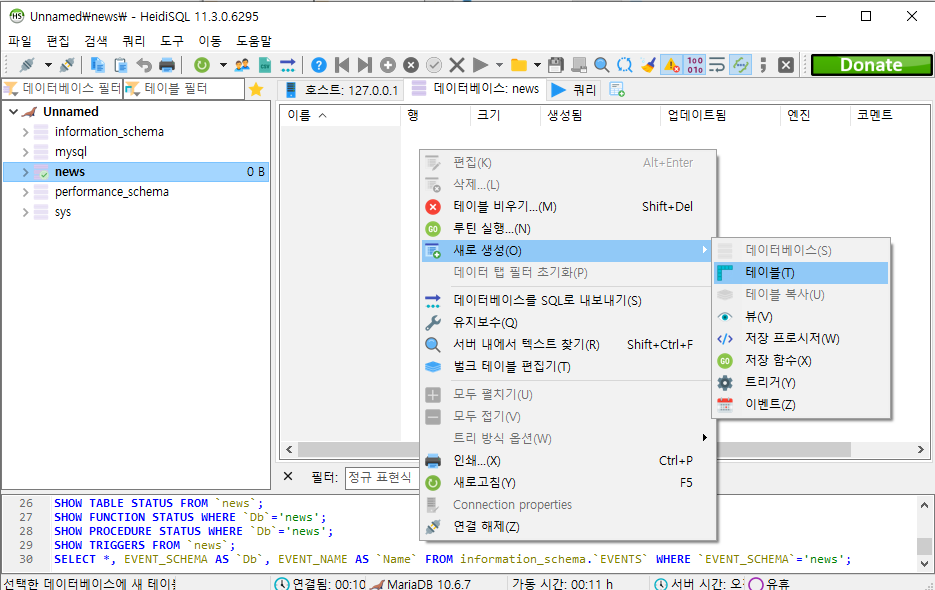
이제 아래와 같은 HeidiSQL 이라는 Third party 프로그램이 같이 설치되었을텐데요.
여기서


처음 설정한 암호로 접속하면 됩니다.
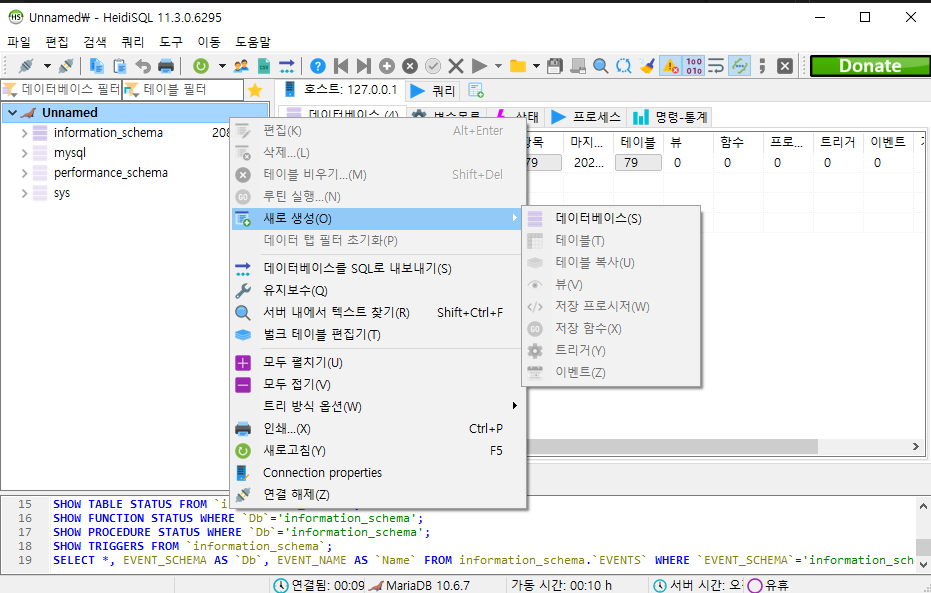
이제 여기서부터 계정, Database 등록, Table 등등 생성하고 사용하면 됩니다.


Visual Studio Code(vscode) 에서 사용하기
먼저 pip 로 pymysql을 설치해야합니다.
터미널에서 pip install pymysql 을 이용하여 설치합니다.
만약 설치가 되지 않는다면 path 설정이 제대로 되지 않은 것입니다.
만약 python 자체도 설치 안해놨었다면 아래 글부터 실행해주세요.
이미 Python을 설치했다면, 아래 글을 확인해서 세팅하시면 됩니다.
#!/usr/bin/env python
# -*- coding: utf-8 -*-

import pymysql

class Sample:
    def __init__(self):
        self.host = "localhost"
        self.user = "root"
        self.password = ""
        self.database = ""

        self.conn = pymysql.connect(host=self.host, user=self.user, password=self.password, database=self.database)
        self.cur  = self.conn.cursor()

    def __del__(self):
        self.conn.close()

    def insert(self, subject, url):
        query = "INSERT INTO sample (date, subject, url) VALUES (now(), '{}', '{}')".format(subject, url)
        self.cur.execute(query)
        self.conn.commit()

    def get_data(self, limit = 3):
        query = "SELECT * FROM sample WHERE upload = 0 limit {}".format(limit)
        self.cur.execute(query)
        results = self.cur.fetchall()
        return results
대략 위의 코드처럼 작성해서 사용하면 됩니다.
'다양한 TIP' 카테고리의 다른 글
| Linux server 절전모드 확인 및 해제 방법(20.04, kernel 5.4) (0) | 2022.05.13 |
|---|---|
| Xenserver iso 폴더 생성 및 저장하기 (0) | 2022.04.22 |
| Xenserver 설치준비 및 설치가이드(xcp-ng-8.2.0) (1) | 2022.04.20 |


댓글